How to Detail & Photograph Used Cars for Faster Sales
A working guide to prepping, shooting, and editing used car photos that sell: detailing, angles, lighting, phone vs. camera, and platform optimization.
Part of the Listings, photos & merchandising guide: Where to list your cars for leads — and how to be on every site at once
Switching from another DMS? Compare DealerVLO to DealerCenter, Frazer, or Lot Wizard.
Why photo quality directly impacts your turn time
Every independent dealer knows that online photos sell the car before the buyer ever steps on the lot. You can price a unit right, have clean title, low miles, and a solid inspection—but if the photos look like you shot them at dusk behind the service bay with a flip phone, the click never happens.
The numbers back it up. Buyers spend most of their time evaluating the interior condition because that's where they'll actually sit, and poor-quality or unclear interior shots can completely turn them away. Meanwhile, exterior shots set the first impression: a poorly lit, cropped, or cluttered photo signals a careless operation, and shoppers scroll past without a second look.
This guide walks through how to photograph used cars for sale the way your lot deserves—starting with pre-photo detailing, the exact angles and lighting that work, whether your phone is good enough in 2026, simple edits that don't mislead, and how to get those images live on Marketplace, your dealer site, and syndication feeds without losing quality.
14-day free trial, then $29/mo · Cancel anytime
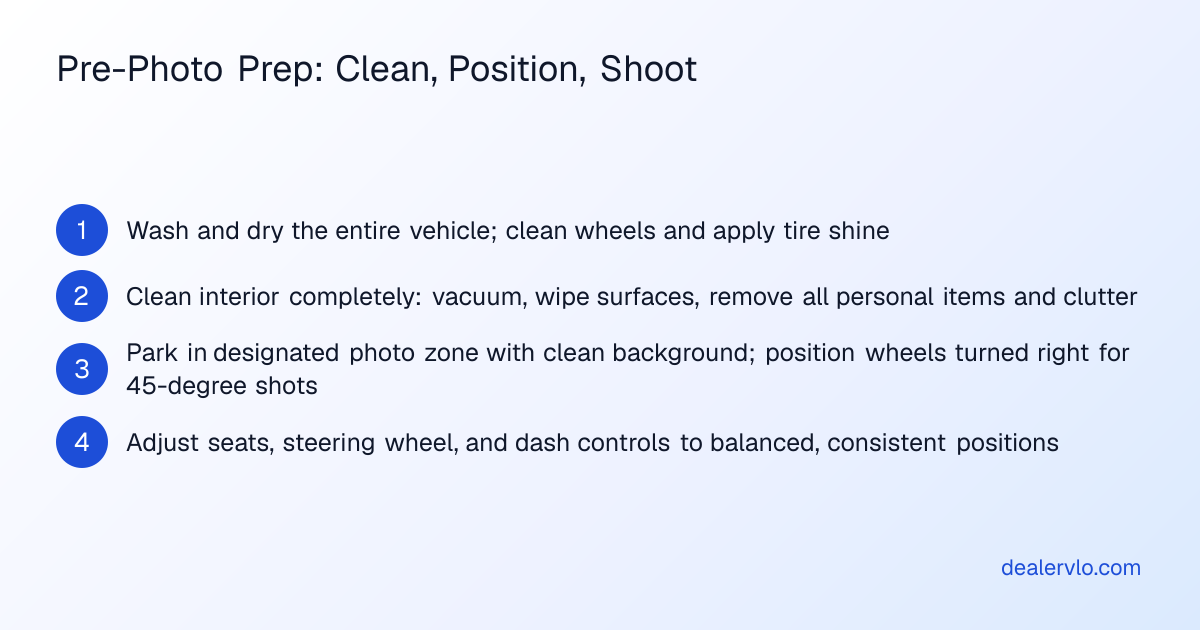
Pre-photo detailing: the work nobody sees but everybody notices
A clean car photographs ten times better than a dirty one, and the difference isn't subtle. Water spots, streaks, and dust catch light in ways that make even a solid unit look neglected. Start with a full exterior wash and a thorough dry—standing water leaves marks that show up in every frame. Clean the wheels and tires, then apply tire shine for a polished look that draws the eye in 45-degree shots where the wheels are prominent.
If you're planning to shoot the engine bay, clean it completely—oil, dirt, and grime photograph worse than they look in person. For paint, address minor scratches and chips before the shoot if you have the time and budget; consider professional paint correction for anything significant. One critical timing note: don't wax the car the same day or even the day before. Fresh wax reflects light like a mirror, causing strange color spots and blotches in your photos. Wax at least a few days in advance, or skip it entirely for the shoot.
Inside, vacuum carpets, wipe down every surface, and clean the windows from the inside—interior glass streaks ruin otherwise clean shots. Pay special attention to high-wear areas: the steering wheel, seats, and dashboard. If the seats are leather, condition them to remove minor scuffs and enhance the finish. Then remove every personal item—keychains, phone chargers, water bottles, tissues, expired parking passes, oil-change stickers, even that Tim Hortons cup in the cupholder. Clutter photographs as chaos, and chaos doesn't sell.
Before you shoot, adjust the seats and steering wheel to create a balanced composition, and set all the dials and toggles to a consistent position—either centered, left, or right across the board. It's a small detail, but it signals care.
Finally, park the car in your designated photo zone. Use the same spot every time for consistency, and make sure the background is clean: no trash cans, random vehicles, cones, or poles. For 45-degree shots, position the front wheels slightly turned to the right to showcase the alloy wheels. For pure side profiles, keep the wheels dead straight—turned wheels break the clean line.
If you're running a tight operation and need every process documented in one place, a good dealer paperwork software setup can store your photo checklists alongside your title and inspection workflows so nothing gets skipped when you're moving fast.
The angles that matter: what to shoot and in what order
The single most important shot in any used car listing is the front three-quarter view, taken at roughly a 45-degree angle to the front corner of the vehicle. Position yourself so the camera sits slightly below hood height, and you'll capture the grille, headlights, hood, front fender, and side profile in a single frame. This is the lead image—always. Brains prefer left-aligned viewing, so the 45-degree left-side angle is widely used and performs well across platforms.
The rear three-quarter shot is the natural next step. Stand behind and to the side at a 45-degree angle, camera slightly below the roofline, and capture the taillights, rear diffuser, exhaust outlets, and the trailing side panel. Buyers who like the front three-quarter immediately look for this angle next, and if it's missing, they notice. Confirm the rear wheel is clearly visible and angled toward the camera.
From there, round out the exterior set with a full frontal view, a full rear view, and both side profiles shot at a low level—door-handle or hubcap height, perpendicular to the car at 90 degrees. If you can get a higher vantage point, shoot the front and rear three-quarters again from above. Always keep the tires fully visible in every frame; cropping the wheels makes the listing look amateur.
Add close-ups of the wheels, the engine bay, and any notable exterior details. Then move to the interior.
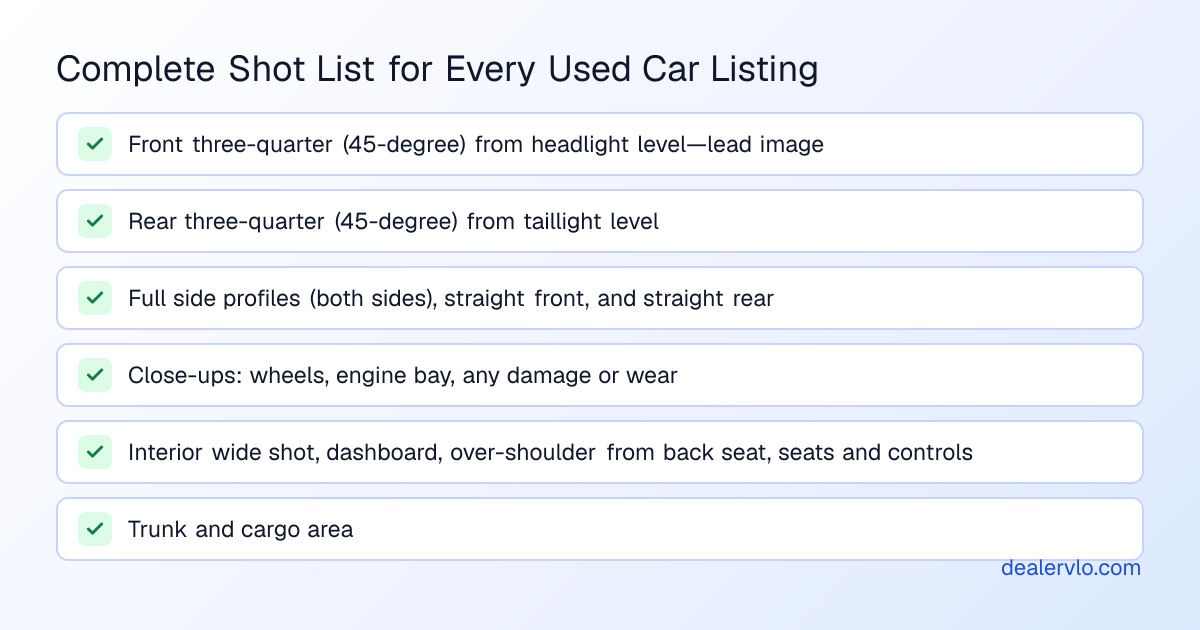
For the interior, start with a wide shot showing the entire cabin from the center of the car, low angle to make the space look larger. Shoot the dashboard from the driver's perspective, then an over-the-shoulder shot from the back seat aimed toward the steering wheel. Add close-ups of the seats, controls, and infotainment screen. Buyers spend the vast majority of their time inside the vehicle, and interior condition strongly impacts the buying decision, so don't skimp here.
Natural light is ideal for interiors. Shoot during the day near a window or in an open space, and position the car so light falls evenly across the cabin. Roll the windows down slightly to let in natural light and cut reflections. Avoid direct sunlight—it creates unwanted contrast and blown-out highlights. Pick a spot where distractions visible through the windows are minimal, and if you're using a camera, set the aperture around f/4 to blur the background through the glass.
Finally, shoot the trunk and any damage. For damage documentation, use printed markers or stickers to point out scratches, dents, or wear. Take close-up, well-lit photos of paint chips, upholstery scuffs, dashboard cracks, or any visible flaws. Honest disclosure increases buyer confidence and reduces post-sale disputes—hiding imperfections will backfire the moment the customer shows up.
A complete listing should include front and rear three-quarters, both side profiles, straight front and rear shots, wheel close-ups, engine bay, dashboard, rear seats, trunk, and a few detail shots. That's the baseline. Add damage shots as needed, and you're done.
Lighting and timing: when to shoot and when to wait
Plan your shoots around the golden hour—early morning or late afternoon—whenever you can. The soft, angled light enhances the car's details while minimizing harsh contrasts and glare. Shooting at noon is the worst option: harsh overhead light, strong shadows, and blown highlights that blur details.
If you have no choice but to shoot midday, move the car to a shaded area or use a polarizing filter to reduce glare. If you're outside in bright sun, make sure the sun is behind you. Shooting with the sun behind the car yields dark, underexposed images that look dingy and unprofessional.
For consistent results, build a repeatable process. Shoot at the same time of day, in the same location, with the same angles every time. Consistency makes your listings recognizable and signals a professional operation—something that matters when you're competing with local SEO strategies that rely on brand trust and repeat traffic.
Before you authorize the work: see whether a repair earns back its cost plus the holding days it adds.
Open the Recon ROI CalculatorPhone vs. camera in 2026: what actually works
Modern smartphones are powerful enough for dealership inventory photography. They offer wide-angle and detail shots without extra lenses, and features like portrait mode, HDR, and night mode help you capture sharp images in varying light. Smartphones now take somewhere between 92 and 94 percent of all photos worldwide, and in 2026, they've replaced dedicated cameras in many everyday situations—including used car listings.
A current-generation phone easily exceeds the minimum image requirements for Facebook Marketplace and other listing platforms, and it delivers share-ready images without post-processing. Speed, immediate workflow, and accessibility matter most when you're turning ten units a week and can't afford a dedicated photographer.
That said, dedicated cameras still have a clear edge when light is difficult, distances increase, or you need deeper control over optics. If you're investing in a DSLR or mirrorless camera, look for models with at least 20 megapixels from brands like Nikon, Canon, or Sony. A 24-70mm or 15-45mm zoom lens is ideal for both wide shots and close-ups, and a 50mm prime lens is often called the perfect focal length for cars—it maintains proportions without distortion.
Anything under five hundred dollars in the camera world typically compromises too much on quality compared to a modern smartphone, but a well-maintained camera can last five to ten years or more than 100,000 shutter actuations, so the investment pays off if you're shooting volume.
Accessories help but aren't required. A tripod stops camera shake and is indispensable for low-light situations or static shots—every professional car photographer uses one. A circular polarizer reduces reflections on paint and glass, cuts glare, and makes colors pop in bright sunlight. A reflector bounces light onto the car to fill in shadows and balance exposure. None of these are mandatory, but they make the job easier and the results more consistent.
If you're evaluating whether to upgrade your entire workflow—not just photos, but inventory intake, pricing, and listing syndication—compare that investment against a best-in-class DMS for independent dealers that automates the steps after the shoot.
14-day free trial, then $29/mo · Cancel anytime
Editing: enhance, don't fabricate
Simple, realistic edits make good photos great. Free or low-cost apps like Pixlr, Snapseed, or Afterlight let you brighten underexposed images, adjust contrast and sharpness, and correct white balance for accurate colors. You can enhance saturation and temperature, add subtle shadows, and even change the background if your lot's backdrop is cluttered.
The goal is to portray the car in the best way possible, but stay realistic. Hiding dents or blemishes will backfire once the customer shows up. Edit to improve quality—don't edit to mislead. Color correction and brightness adjustments are fine; airbrushing out a door ding is not.
In 2026, AI-powered virtual studio tools can deliver professional-looking results from smartphone photos at a fraction of the cost of traditional retouching, and many platforms offer automated background replacement and lighting correction. These tools work well for volume dealers who need speed and consistency, but the same rule applies: use them to improve clarity and presentation, not to hide condition issues.
If you're documenting every unit's condition for your records and customer transparency, the same system that manages your out-of-state sale checklists can store your pre-shoot condition reports and link them to the final photos.
Uploading and optimizing for Marketplace, your site, and feeds
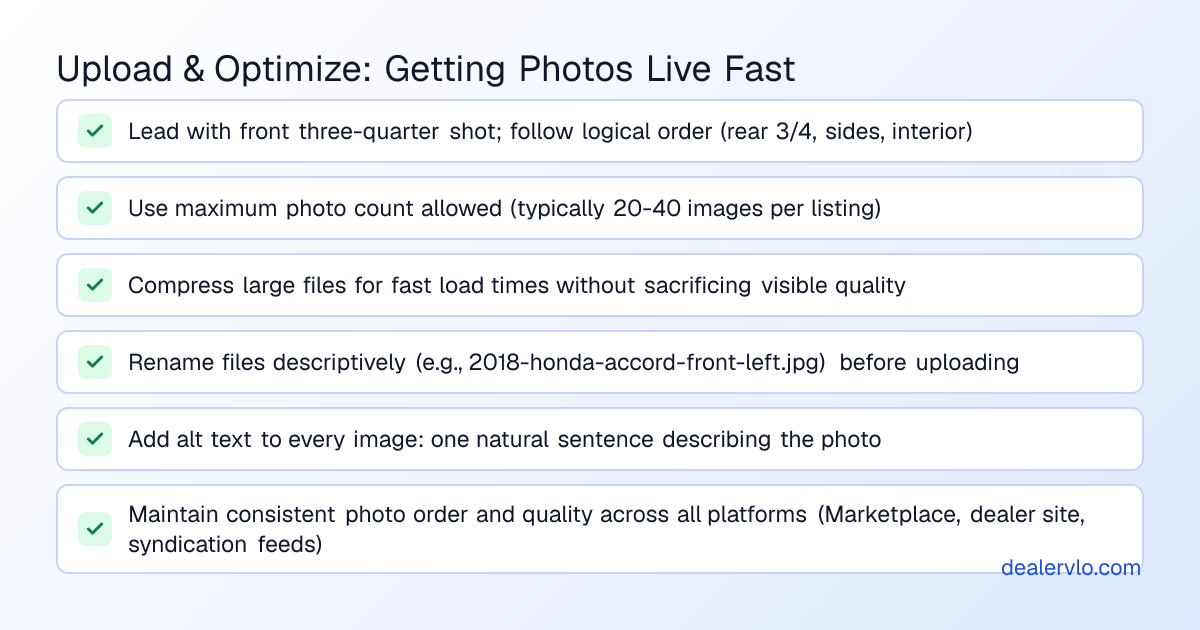
Once your photos are edited, the next step is getting them live. Facebook Marketplace has a minimum image requirement of 500×500 pixels, which any modern phone or camera exceeds by a wide margin. Upload your lead image first—the front three-quarter—and follow with the rear three-quarter, side profiles, and interior shots in a logical order.
Photo limits vary by platform: Facebook Marketplace allows up to 10 photos, AutoTrader allows 30 (or 50 with Premium), eBay Motors allows 24, and Cars.com allows up to 100. Use as many as you can on each platform. More photos mean more engagement, and engagement drives clicks. Include every angle, every interior shot, the engine bay, the trunk, and damage documentation. Don't leave gaps.
For your dealer website, optimize file sizes to balance quality and load speed. Large, uncompressed images slow page load times, which hurts both user experience and search rankings. Most content management systems and DMS platforms automatically compress uploads, but if yours doesn't, use a free tool like TinyPNG or ImageOptim before you upload.
Name your image files descriptively before uploading—something like "2018-honda-accord-front-left.jpg" instead of "IMG_1234.jpg." Descriptive file names help search engines understand what the image shows, which can improve your visibility in image search results and contribute to your overall local SEO performance.
If your DMS or website builder supports it, add alt text to every image. Alt text is a short description that search engines read and that screen readers use for accessibility. Write it naturally, like a caption: "Front three-quarter view of a 2018 Honda Accord EX in silver, parked on a clean lot with wheels turned right." It's a small step that carries real SEO weight.
Finally, maintain consistency across platforms. Use the same photo order, the same lead image, and the same level of quality whether you're posting to Marketplace, Cars.com, Autotrader, or your own site. Consistency builds trust, and trust drives the phone call.
How this fits into your broader operation
Good photos don't exist in a vacuum. They're part of a larger workflow that includes intake, reconditioning, pricing, listing, and follow-up. If you're shooting twenty units a month, you need a system that ties the photo process to your inventory records, your listing syndication, and your customer communication—so nothing falls through the cracks.
That's where a purpose-built used car dealer software platform makes the difference. It connects the photo shoot to the VIN decode, the recon checklist, the listing copy, and the CRM follow-up in one place. You're not juggling spreadsheets, sticky notes, and three different logins to get a car from the buy to the lot to the listing.
If you're just getting started and trying to nail down every piece of the operation—from how to open a used car dealership to what a full setup actually costs—budget time and money for a proper photo process. It's not glamorous, but it's one of the highest-ROI activities you'll do every week.
For dealers buying wholesale inventory to flip quickly, the photo process is even more critical. You're competing on speed and presentation, and buying wholesale cars only makes sense if you can turn them fast. Fast turns require fast clicks, and fast clicks require photos that stop the scroll.
Frequently asked questions
What's the best time of day to photograph used cars for sale?
Early morning or late afternoon—often called the golden hour—provides soft, angled light that enhances details and minimizes harsh shadows. Avoid shooting at noon when overhead sunlight creates glare and blown highlights. If you must shoot midday, move the car to a shaded area and ensure the sun is behind you, not behind the vehicle.
Can I use my smartphone to photograph used cars, or do I need a professional camera?
Modern smartphones in 2026 are powerful enough for dealership inventory photography and deliver results that meet or exceed listing platform requirements. They're fast, convenient, and produce share-ready images without extra equipment. Dedicated cameras offer more control in difficult lighting and greater long-term flexibility, but a current-generation phone is absolutely sufficient for most independent dealers shooting their own inventory.
How many photos should I include in a used car listing?
Use as many as the platform allows. Facebook Marketplace allows up to 10 photos, AutoTrader allows 30 (or 50 with Premium), eBay Motors allows 24, and Cars.com allows up to 100. At minimum, include front and rear three-quarter views, both side profiles, straight front and rear shots, close-ups of the wheels, engine bay, dashboard, rear seats, trunk, and any damage or wear. More photos increase engagement and buyer confidence, and they reduce the number of condition questions you'll field later.
Should I edit photos of used cars before uploading them?
Yes, but keep edits realistic. Use free or low-cost apps to brighten underexposed shots, adjust contrast and sharpness, and correct white balance. Enhance colors and saturation to make the car look its best, but never hide dents, scratches, or wear. The goal is to improve presentation and clarity, not to mislead buyers. Honest photos reduce disputes and build trust.
Do I need to photograph damage on used cars?
Absolutely. Use printed markers or stickers to highlight scratches, dents, paint chips, or upholstery wear, then take well-lit close-ups. Honest damage documentation increases buyer confidence, reduces post-sale disputes, and signals transparency. Hiding flaws will backfire the moment the customer arrives to inspect the car.
What's the most important photo angle for a used car listing?
The front three-quarter view, taken at a 45-degree angle to the front corner of the vehicle, is the most important shot. It captures the grille, headlights, hood, fender, and side profile in one frame and should always be your lead image. Buyers expect it, and its absence or poor execution will hurt engagement.
Bottom line
Learning how to photograph used cars for sale isn't complicated, but it requires a repeatable process and attention to detail. Clean the car thoroughly, shoot at the right time of day, use consistent angles, and edit honestly. Whether you're using a phone or a camera, the goal is the same: give the buyer enough visual information to make the call or schedule the visit.
Good photos won't fix a bad unit or a bad price, but they'll make a good unit sell faster and at a higher gross. In a market where most shoppers never leave their couch until they've already decided, your photos are your showroom floor. Treat them that way.
14-day free trial, then $29/mo · Cancel anytime